The easiest way to understand how transaction work is to walk through an example transaction. In this section, we’ll walk through a transaction made with MetaMask.
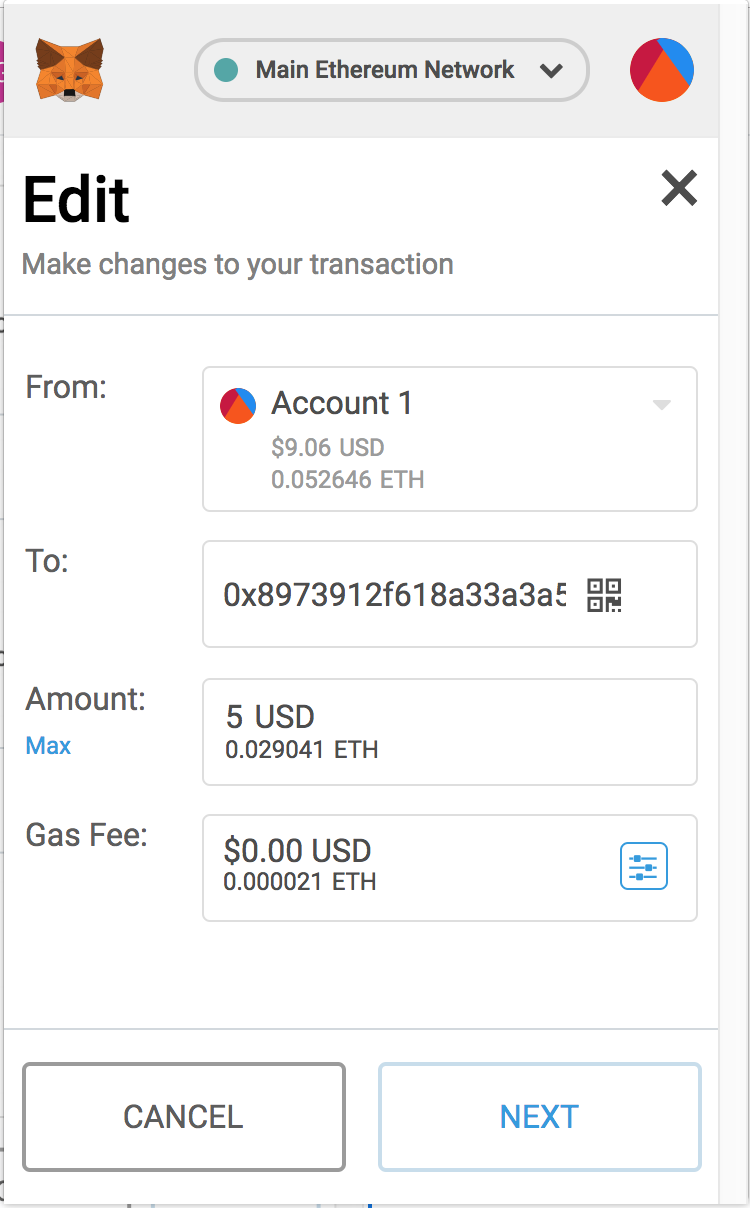
First, I open MetaMask and click “send.” This takes me to a panel that allows me to specify a recipient address, the amount of ether to send, and the gas price/gas limit (click the blue button by the gas fee field). In this transaction, I’ve chosen to send approximately 0.029eth ($5USD) of ether.
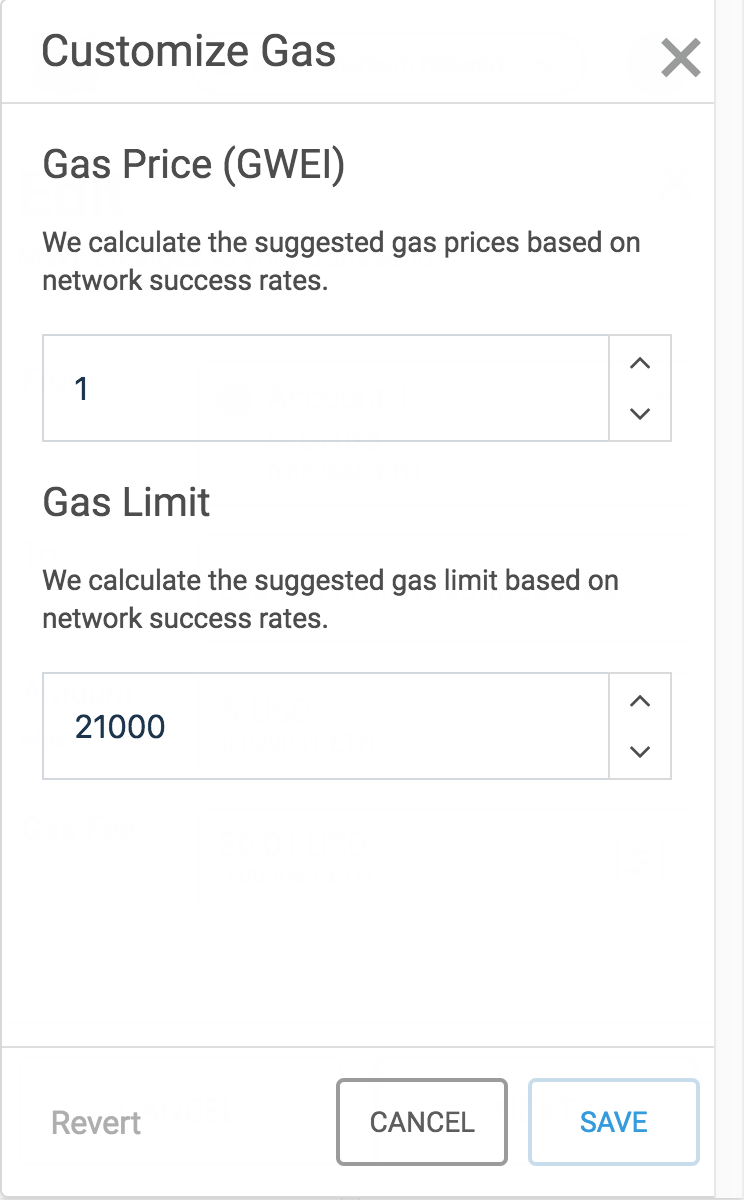
MetaMask automatically suggests a gas price and gas limit for your transaction based on the current market conditions. Together, these determine the total transaction fee that you pay. In this example, we see that MetaMask has automatically set the Gas Price as 1 GWEI, and the Gas Limit as 21000. Let’s break this down:
- The Gas Price is the amount of ether you’re willing to pay per unit of gas (computation) that this transaction takes on the EVM. 1 GWEI is shorthand for
ether. We usually talk about gas in terms of GWEI, since transaction fees are usually on the order of several GWEI per unit of computation. MetaMask suggests 1 GWEI per unit of gas as of November 18th, 2018.
- The Gas Limit is the maximum number of units of gas (computation) you’re willing to pay for. An exact mapping between Ethereum Virtual Machine instructions and units of gas is given precisely in the Ethereum yellowpaper. We can see in the images below that MetaMask suggests 21000 units of gas as the gas limit—since the EVM operates deterministically, it is actually known that any transaction that just executes a transfer of ether will always take exactly 21000 gas, so MetaMask sets this automatically for us.
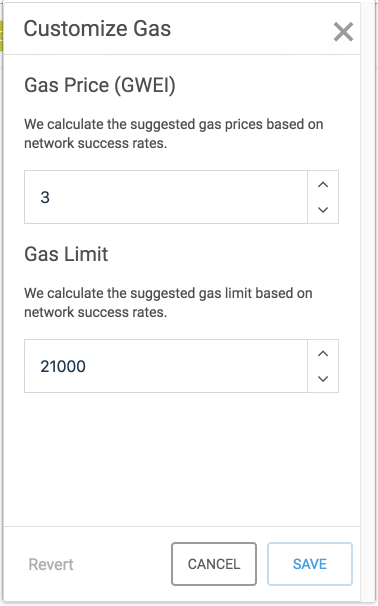
If you want to decrease the expected time for your transaction to be included in a block (mined), you can manually increase the gas price, as we’ve done in the third image below (we’ve set the gas price to 3 GWEI). If you’d like to pay a lower transaction fee and don’t mind waiting for your transaction to be mined, you can decrease the gas price.
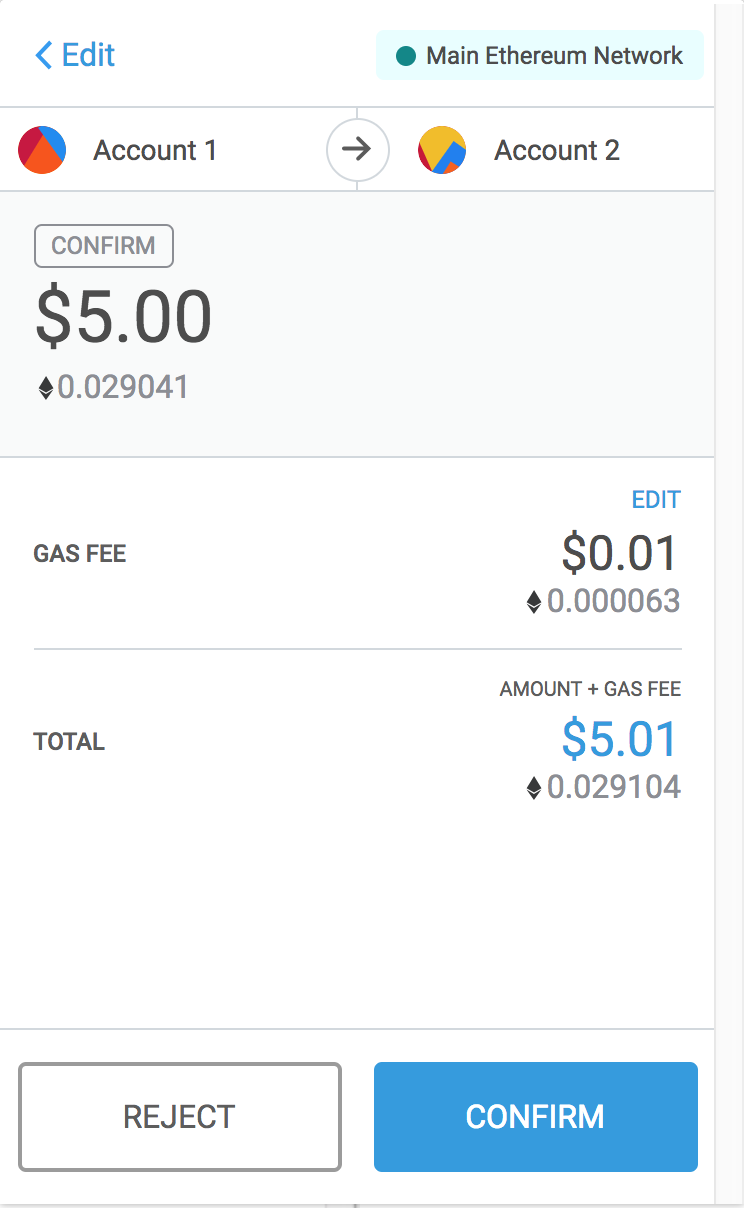
We can use all of the above information to calculate our transaction fee. We are paying 3 GWEI per unit of gas, for exactly 21000 units of gas. This means that we’ll pay a total of 63000 GWEI = 6.3 * 10^-5 = 0.000063 ether (as we can see in the fourth image). The current price of ether is $171.57 as of November 18th, 2018, so this translates to a transaction fee of about one cent.
Once you’re satisfied with the gas price, hit “save” and “next” to continue to the confirmation screen. Hit “confirm” to send your transaction request to the network. Metamask then signs the transaction request with your private key (stored in-browser), sends the request to a machine which they manage which runs an Ethereum node, and starts broadcasting your signed transaction request to other nodes on the Ethereum network.
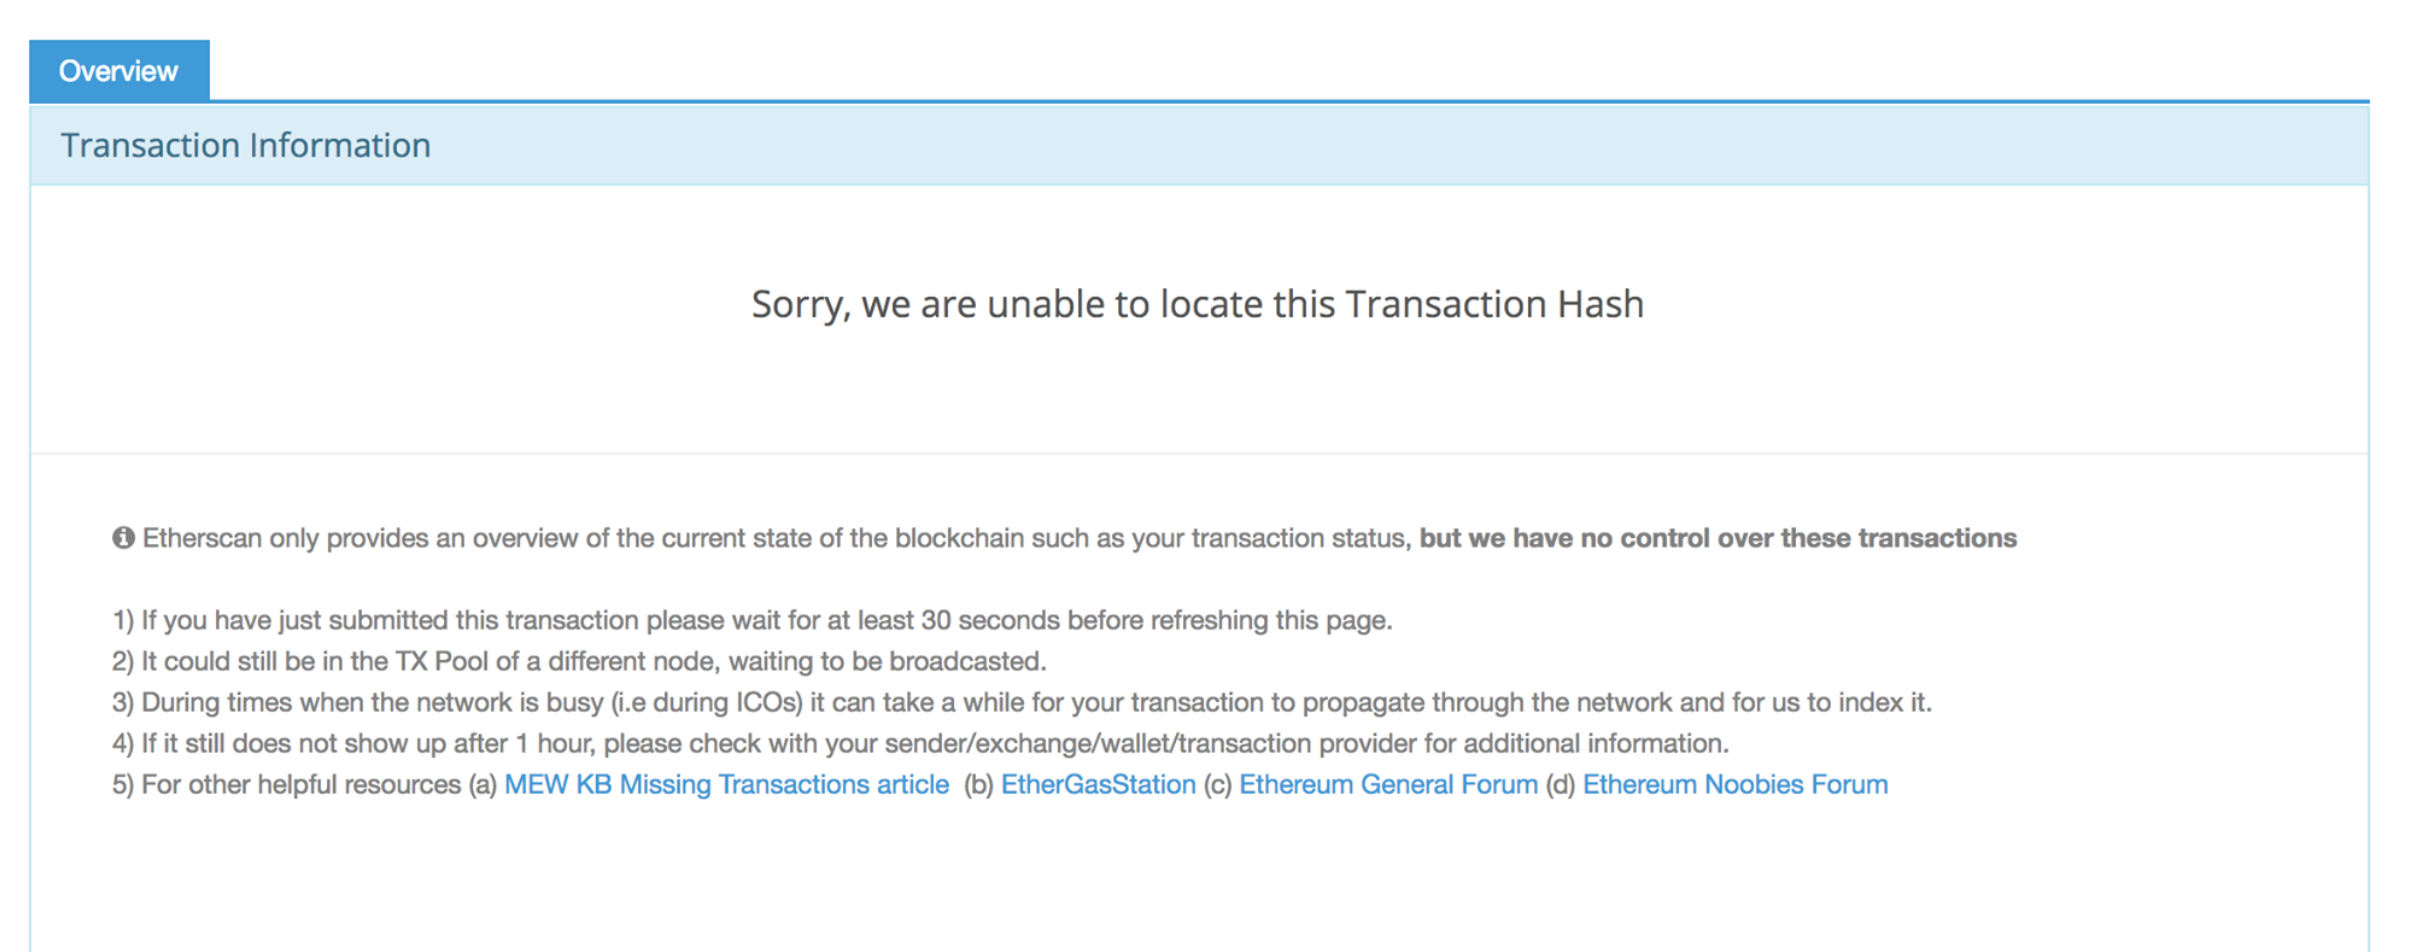
We’ll now track the status of our transaction request with Etherscan. Earlier, we used Etherscan to look up information about accounts. I can also use Etherscan to look up any transaction by its Transaction Hash (basically a unique identifier for the transaction), by going to https://etherscan.io/tx/[tx hash].
Etherscan runs Ethereum full nodes of its own. Because of this, Etherscan is able to hear about and track the status of newly mined blocks and new transaction requests very soon after they are initially broadcast.
The first image below shows the page displayed by Etherscan for our particular transaction request immediately after sending off our transaction for the first time. It is likely in this case that by this point the request has not yet propagated to all nodes on the Ethereum network; in particular, Etherscan’s nodes have not yet picked up on our request.
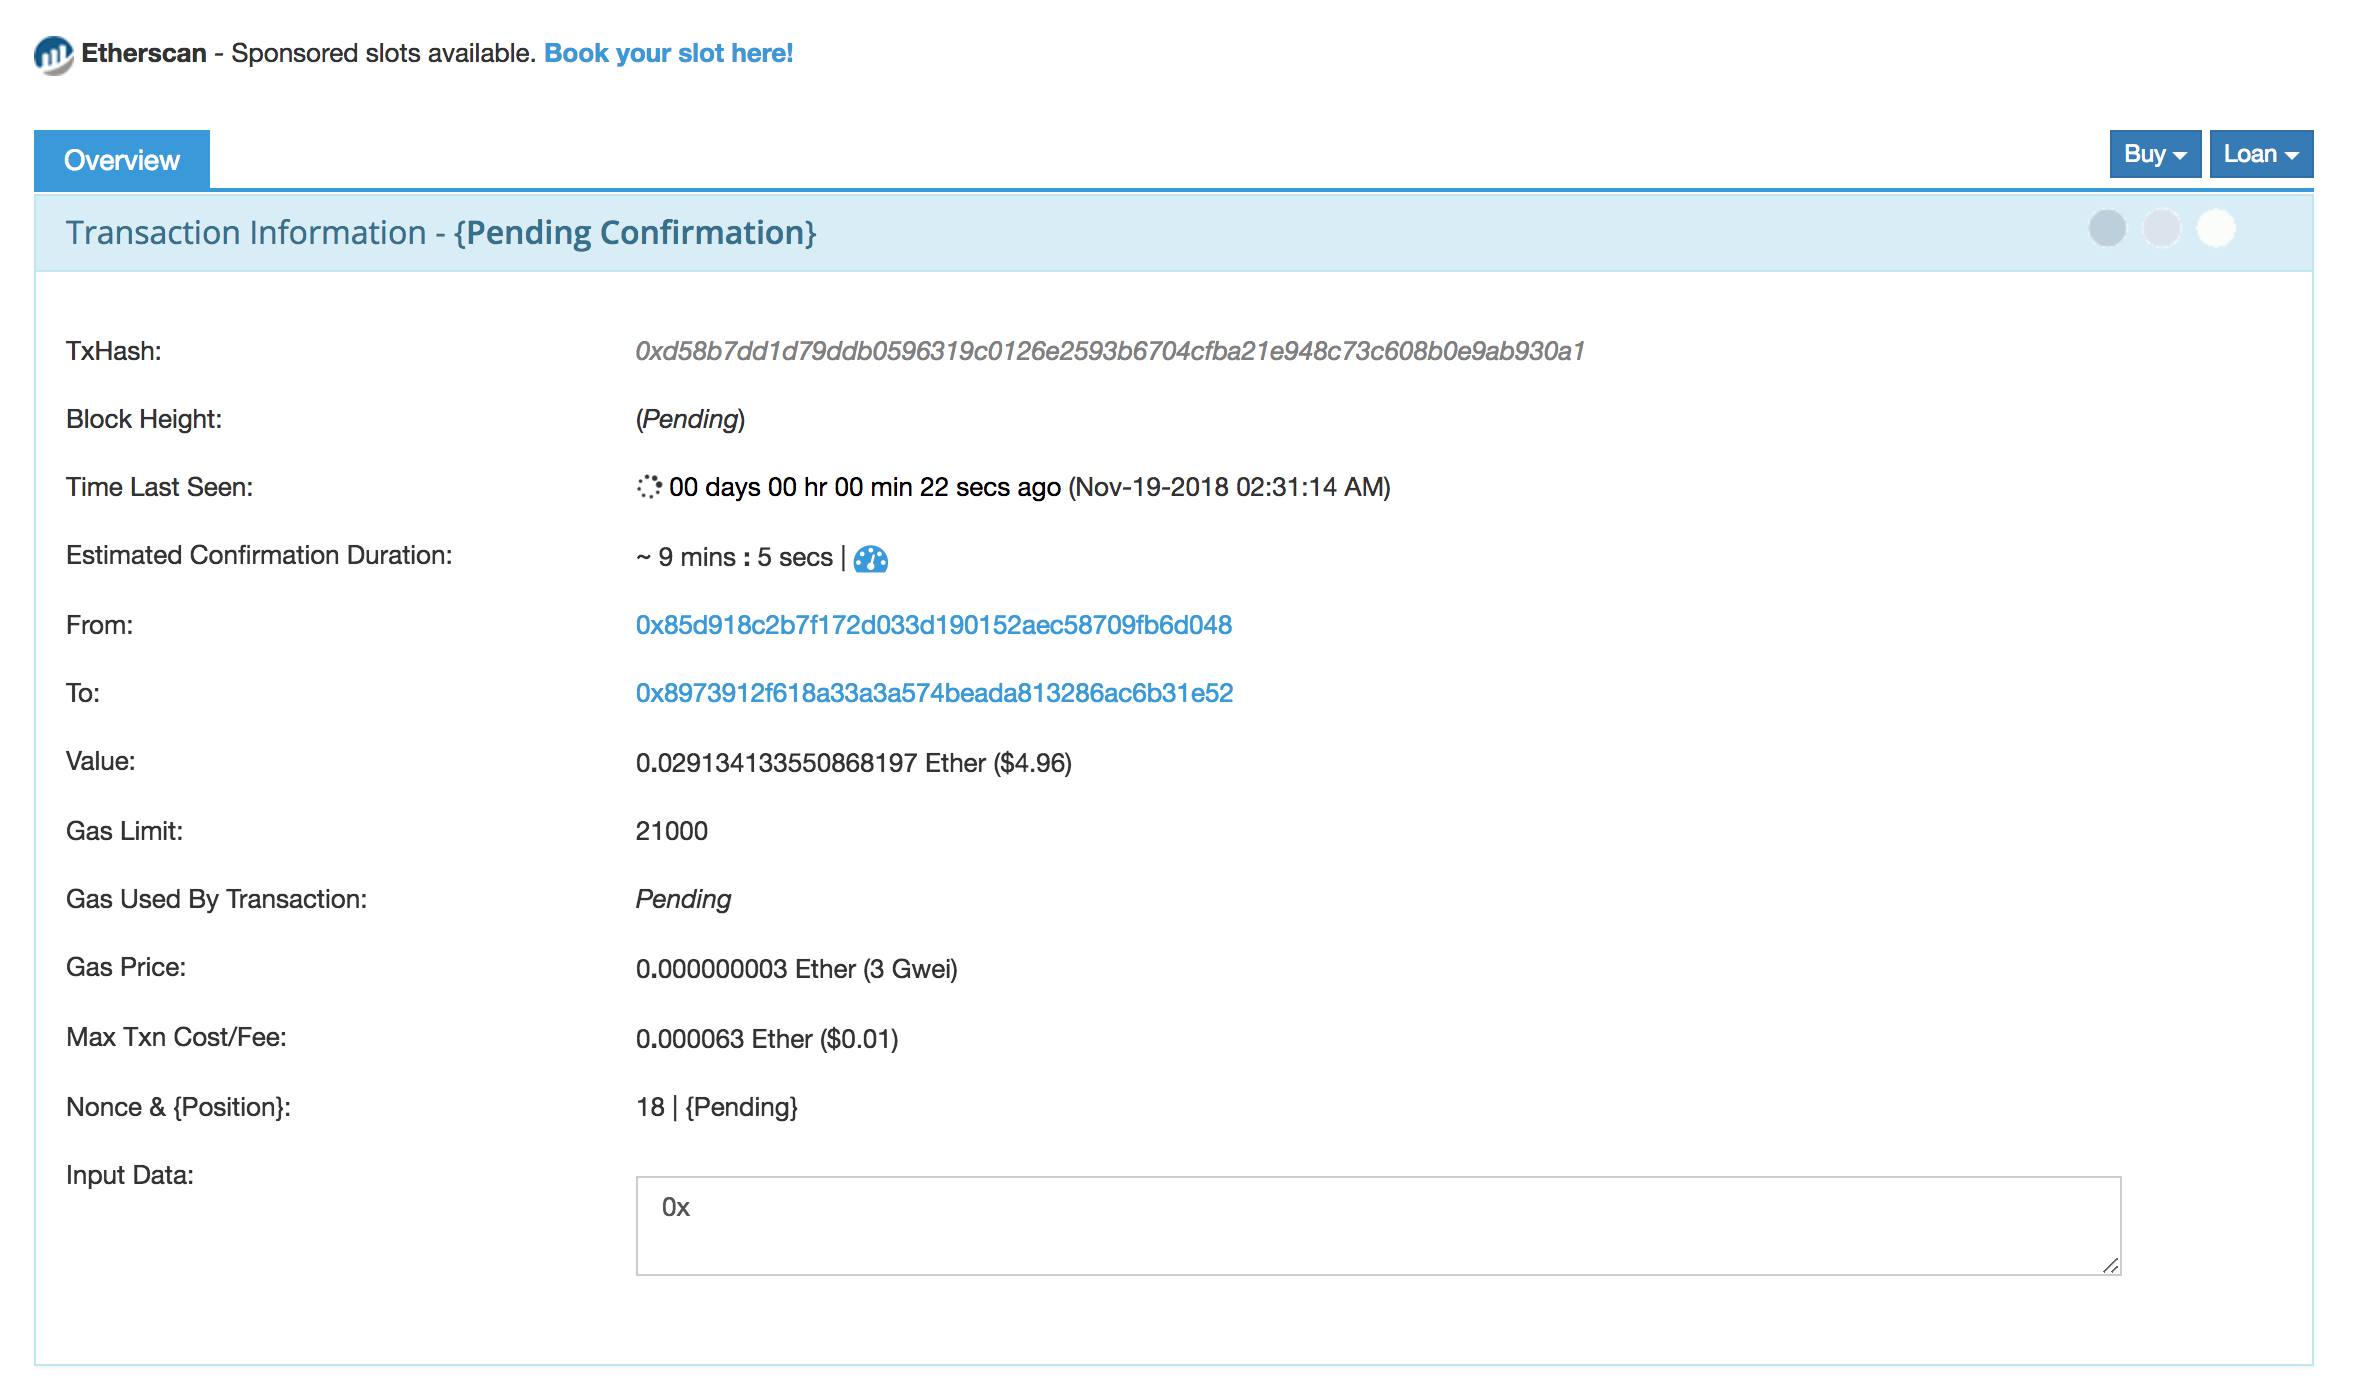
The second image shows the page Etherscan displays after its nodes have added our transaction request to their mempools, but before the transaction has been included in a mined block. We can see all the expected fields: From, To, Value, Gas Limit, Gas Price, etc. Note that “Block Height” is not yet set, since the transaction has yet to be included in a block.
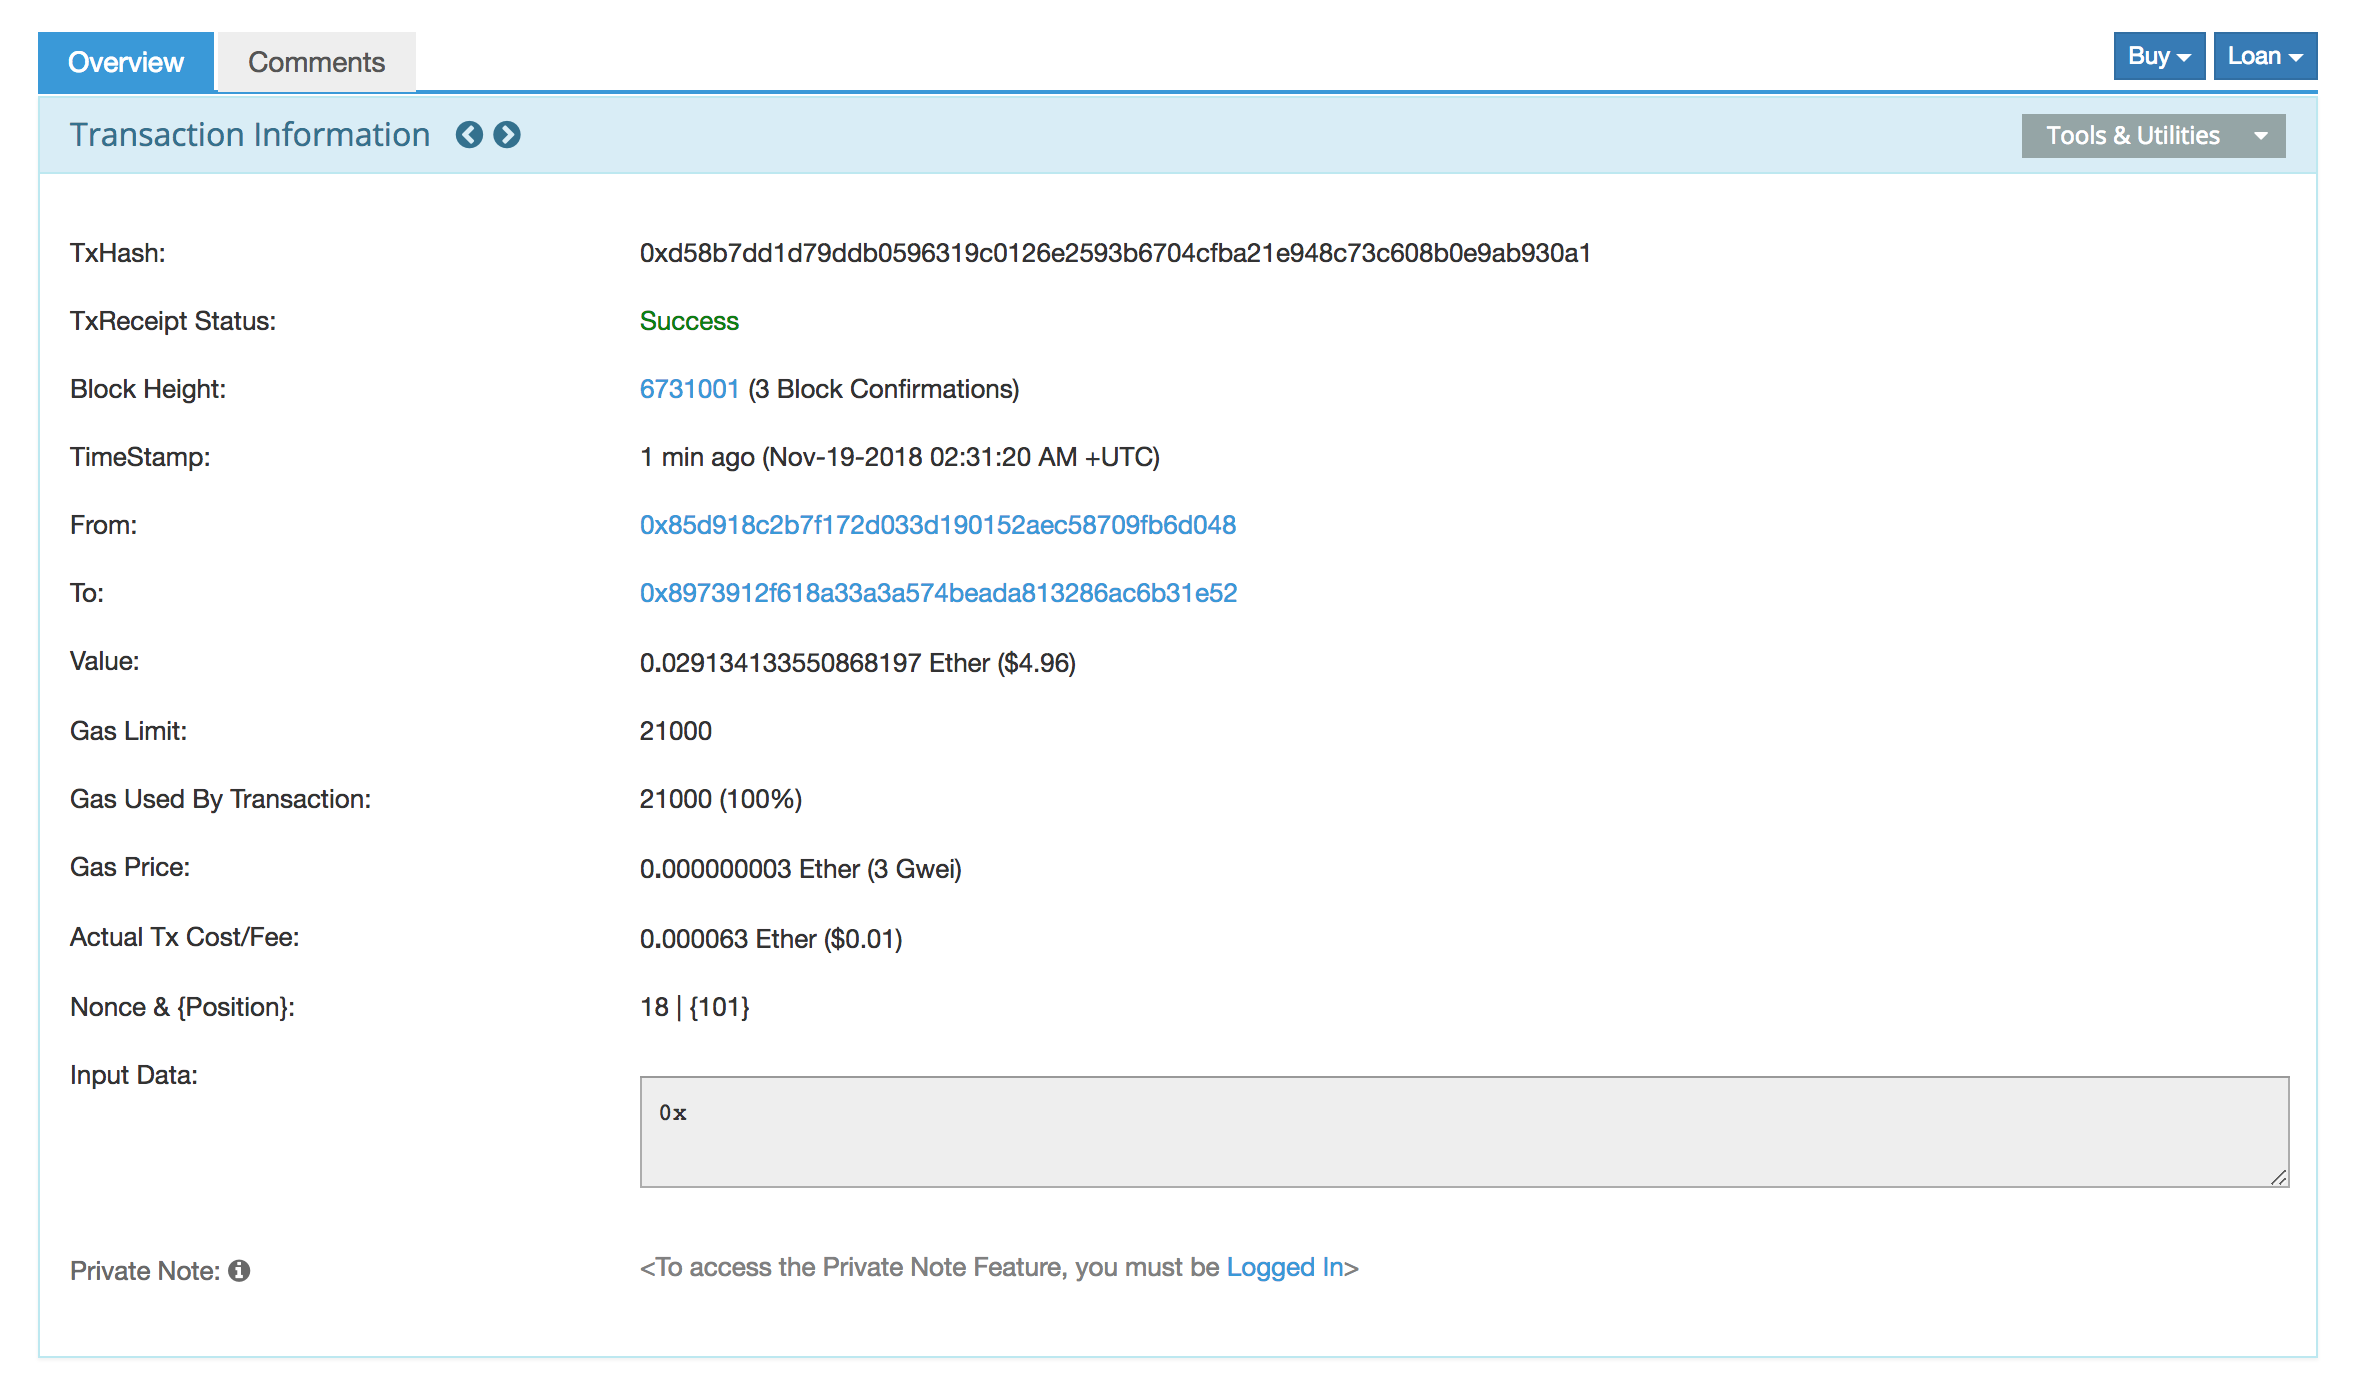
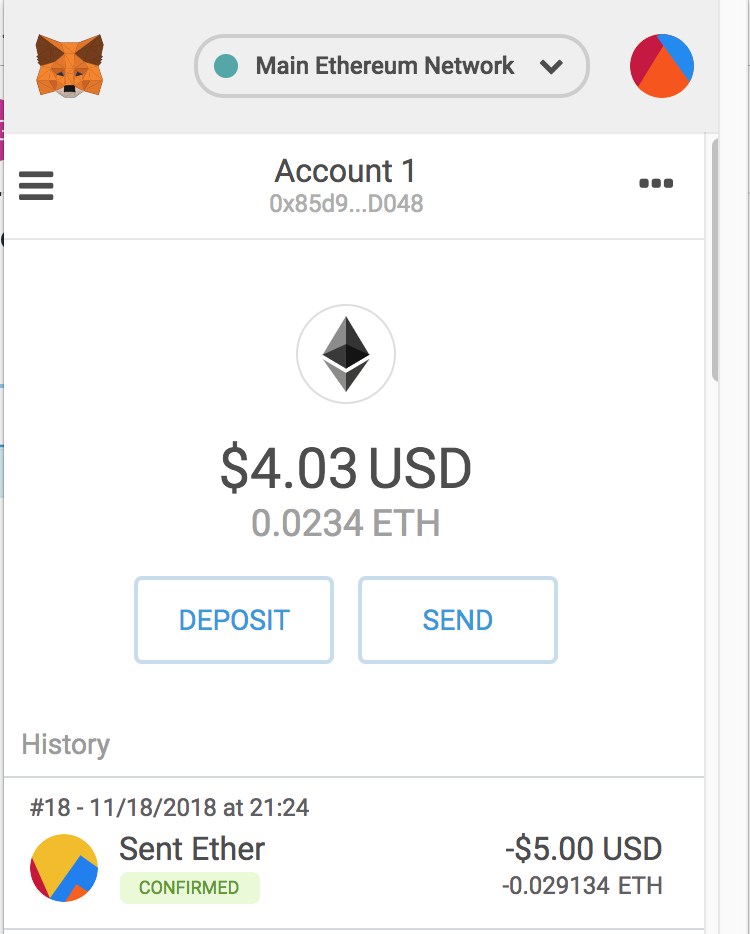
The third image shows the page displayed once the transaction has been included in a block mined by some miner and propagated to Etherscan’s nodes. Now we can see that our transaction has been “committed” to the network, in block 6731001. If you’d like to see this transaction for yourself, you can visit this Etherscan link. We can also see our confirmed transaction reflected in MetaMask at this time.
Here is another great guide which walks through the transaction lifecycle in a little more detail, taking as a case example a contract.